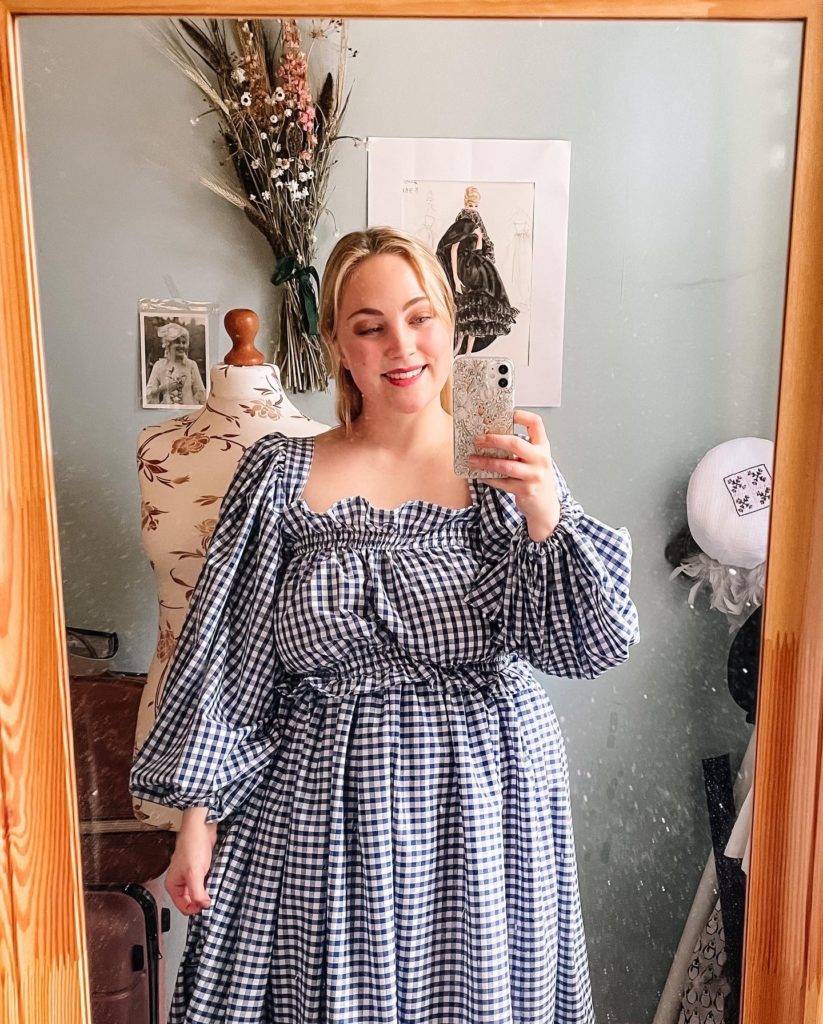
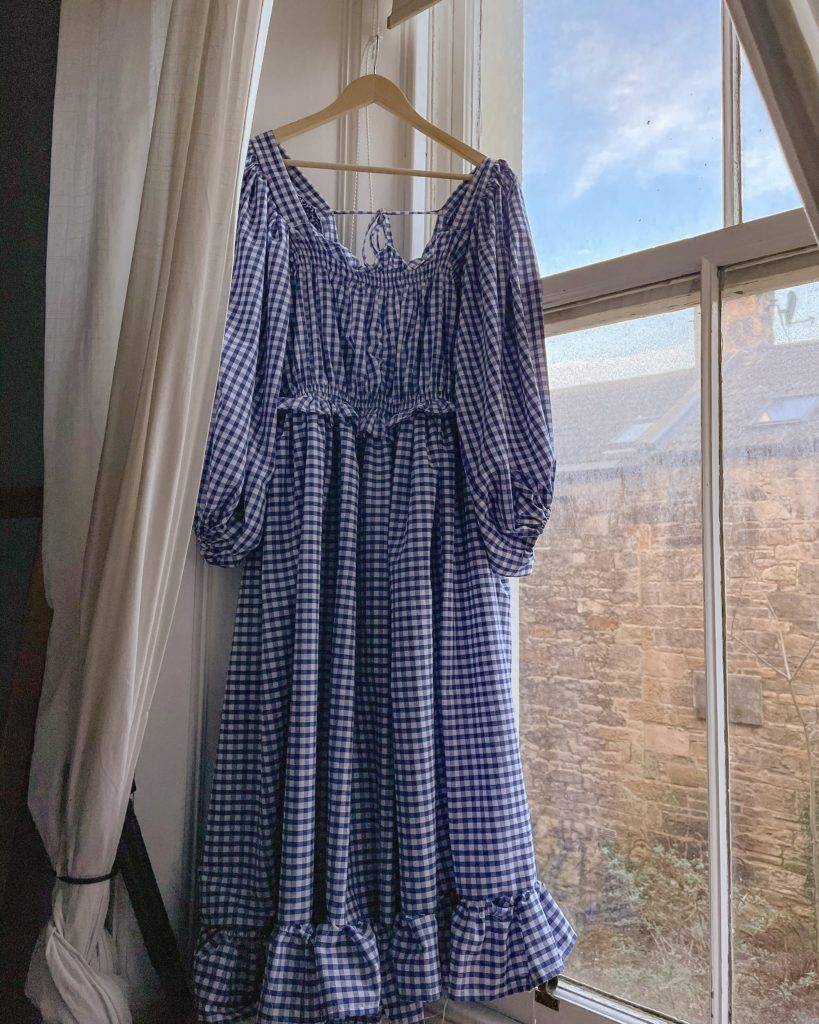
This has been such a fun project! After looking around for inspiration online I figured out that if I made basically one big rectangle for the skirt, two rectangles for the sleeves and two rectangles for the bodice I could sew a big puffy picnic dress that would be perfect for summer!

Price & Materials
£14.40 Blue Gingham Polycotton 4m x 115cm
£1.99 Coats Moon 1000 yards White Thread
£3.99 White Elastic Thread (20m set of 2 – way more than I needed)
Total: £20.38
How to make the dress?
– SKIRT –
Cut out a big rectangle that is the length you want the skirt to be + seam allowance. Fold down upper edge and sew it down – with enough space for an elastic band. By using two safety pin, pin one of them to the edge of the opening of the waistband and use the second band to trace through the “tunnel” until you have traced the elastic through to the other end. Attach the elastic to each other and sew up the two vertical edges of the skirt piece so they form a circle.
If you want the extra frill at the end of the skirt, cut out a strip of fabric that is 2-3 times the circumference of the skirt and sew the hem down. Gather the fabric at the top and attach to the skirt (wrong sides together so that you can fold it over and have a neat finishing seam).
– SLEEVES –
Measure you arm cye (circle around your upper arm and armpit) and cut the width of the fabric so that it is at least twice of that measurement (I added a few centimeter extra for wonderfully lush sleeves). The length should be whatever length you want the sleeves to be + seam allowance for the hem. Sew together the edges and fold over the sleeve opening for an elastic, just like with the skirt, or alternatively add a ribbon or just a cuff.
– BODICE –
The bodice is also two rectangles where the width is 2 x your bust measurement and the length as long as you want your top to be (measure on your body and remember to add seam allowance so you can hem those raw edges if needed). If you are using a gingham pattern is lovely to already have lines to follow, but on another pattern I would draw out lines that you can follow when shirring. I also recommend trying your shirring on a little piece of fabric before going all out on your fabric.
The shirring is done by using elastic thread in the bobbin (under thread) and you have to hand wind the bobbin without stretching the thread (actually doesn’t take that long!) if you use the machine winder it can be too tight and if you stretch it, that can also cause problems. Remember that the elastic will be visible underneath the fabric. Increase your stitch length – the longer the stitch the more the fabric will gather. And you might have to adjust your tension as well – this will different between machines so it’s good to check when sewing the test bit. When you start sewing the fabric will start to bunch up, so you will have to hold it straight for the other lines. The full effect of the shirring won’t show up until you have done a few lines.
Now you have the option of either shirring the entire fabric, or you can shirr the middle and leave a bit of a frill at the top and waist, or leave the fabric over the boobs un-shirred for the nice effect that I went for.
Lastly steam the shirred fabric (you can just use an iron with a steam function) – it will make the stitched tighten ip slightly and make it look neat!
– PUTTING IT ALL TOGETHER –
To finish make shoulder straps to whatever width you want, sew the edges together and turn inside out. Attach the sleeves (I machine sewed the top and hand stitched the armpits as I was experimenting with elastic, but ended up not using it. I folded the top of the fabric down to create a smoother feel under the arm, but you can also cut the corners of your bodice rectangles and remember not to shirr to close to it) and also attach to the bodice. It can be a good idea to try the bodice on and measure out where you want the straps to go. Remember that the bodice is elastic. Sew two narrow straps that you attach to the back as a tie detail, if you don’t want the shoulder to fall down. And lastly attach the bodice to the skirt!
Voila!

What did I learn through making this dress?
- Shirring can be very useful! I’ll definitely use it more for gathered edges as it gathered automatically, instead of sewing long stitches and gathering by hand. It also looks great so will probably make more garments with it. For example where the back is shirred only to make it easier to get in or out of.
- If there is a will, there’s a way – I of course already knew this, but it seems to be my slogan for all things sewing!
- It’s okay to change ideas mid-project. I had originally intended to have a tie detail at the waist and also in the shoulders, but it didn’t work out the way I wanted so I simply changed them.


